This weld inspection scanner is designed for handheld weld inspection, defect inspection on metal, material and heat treatment condition sorting, as well as the thickness change detection. Non-direction function enables real-time display of crack depth and crack direction angle with orthogonal nondirectional probe.
SMART-501 is designed with advanced microelectronic digital processing technology, real-time double-frequency eddy current testing technology, and microprocessing technology. It is well used for defect inspection on metal, material and heat treatment condition sorting, as well as the thickness change detection. Inspection settings for different applications can be stored in files and simply called up when needed.
KEY FEATURES
· Two independent testing channels
· Two independent frequencies available
· Non-direction function enables real-time display of crack depth and crack direction angle with orthogonal nondirectional probe
· Automatic measurement and manual measurement are available for phase and amplitude
· Non-equal phase/amplitude alarm function
· Impedance XY signal display and real-time chart display
· 1 mixing unit to suppress noise signal at a constant frequency
· Operation tips and help function can be called to display relevant information
· Various filtering methods
· Parameters can be stored in advance and easily called out for inspection when needed
· Video image and eddy current testing signal can be get at once
· Connectors available for USB and Internet
· Built-in lithium battery for working 8 hours per charge
· Languages available in English and Chinese
TECHNICAL SPECIFICATION
|
ECT SPECIFICATION |
|
|
Channel |
2 channels |
|
Frequency |
2 frequencies per channel |
|
Frequency Range |
10Hz-10MHz |
|
Screen Display |
Real-time strip chart, 2 impedance plane |
|
Mixing Unit |
1 mixing unit to suppress noise signal at a constant frequency |
|
Filter |
High pass: 0-500 Hz; Low pass: 10Hz-10KHz; Digital: 1-100 |
|
Pre-Gain |
10-35dB |
|
Drive Voltage Level |
8 levels |
|
Amp & Pha Measurement |
Automatic/Manual measurement |
|
Gain |
0-90 dB in 0.5 dB steps |
|
Phase |
0-359° in 0.1° steps |
|
Alarm Mode |
Half Amp-Pha/ Amp-Pha/ Box |
|
Balance |
Digital electronic balance |
|
Probe Calibration |
Probe self-diagnosis with probe calibration curve |
|
Gain Ratio (Y/X) |
0.1-10, X and Y can be set separately |
|
Non-direction |
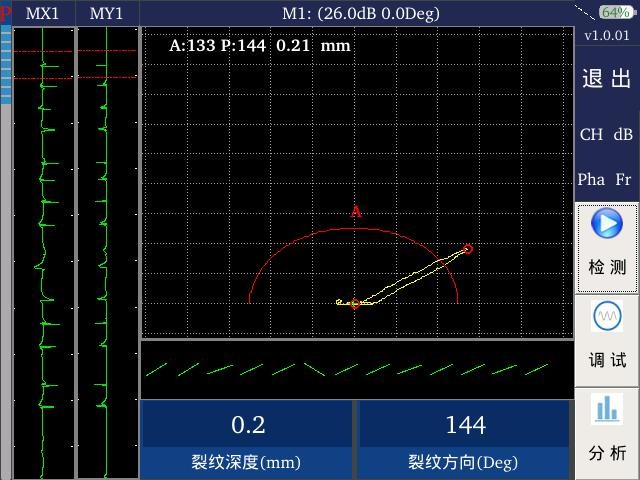
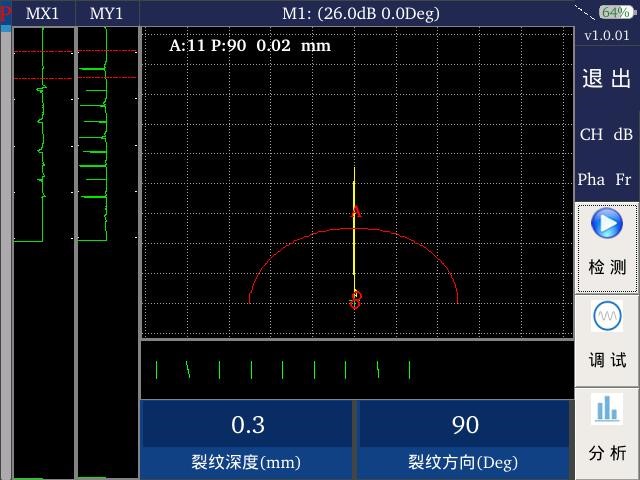
Non-direction function enables real-time display of crack depth and crack direction angle with orthogonal nondirectional probe |
|
Calibration Curve |
Defect depth (thickness)-Amp/Y Amp/Pha/P Curve calibration |
|
Probe Connector |
LEMO |
|
Port |
USB, Internet, WIFI, Mouse connection |
|
Data Analysis |
Automatic generation of report including testing information, defect signal, defect location, date, person etc. |
|
Data Record and Manage |
1. Enable to save the impedance signal of defect, to save defect wave file and to save the testing parameters; 2. Enable to store the testing data and recall to display for analysis; 3. A storage card is supplied with the instrument for convenient data storage, and the card can be taken back to laboratory for data analysis. |
|
Human Computer Interaction (HCI) |
Human Computer Interaction enables to: 1. Manually separate and sort the signals to get amplitude and phase of different type of signal; 2. Manually revise the phase offset of different signals; 3. Calibration on the amplitude of the standard sample signal; 4. Set the time duration of the data sampling. |
|
OTHER SPECIFICATION |
|
|
MPU |
32bit dual-core processor |
|
Storage |
16G/64G/128G |
|
Memory |
1G |
|
Display Screen |
8 inch TFT, high brightness, LCD color touch screen, 1280*720 pixels |
|
Operating Temperature |
-20°C to 55°C |
|
Instrument Dimensions |
Not more than 2kg; 240mm x 140mm x 60mm |
|
External Power Supply |
DC19V adapter, 14.8V 5.7AH rechargeable lithium battery |
NONDIRECTIONAL TESTING SIGNAL
(Defects at 45 degree can be inspected)


Figure 1 Defect at 48 degree Figure 2 Defect at 144 degree


Figure 3 Defect at 90 degree Figure 4 Defect at 0 degree